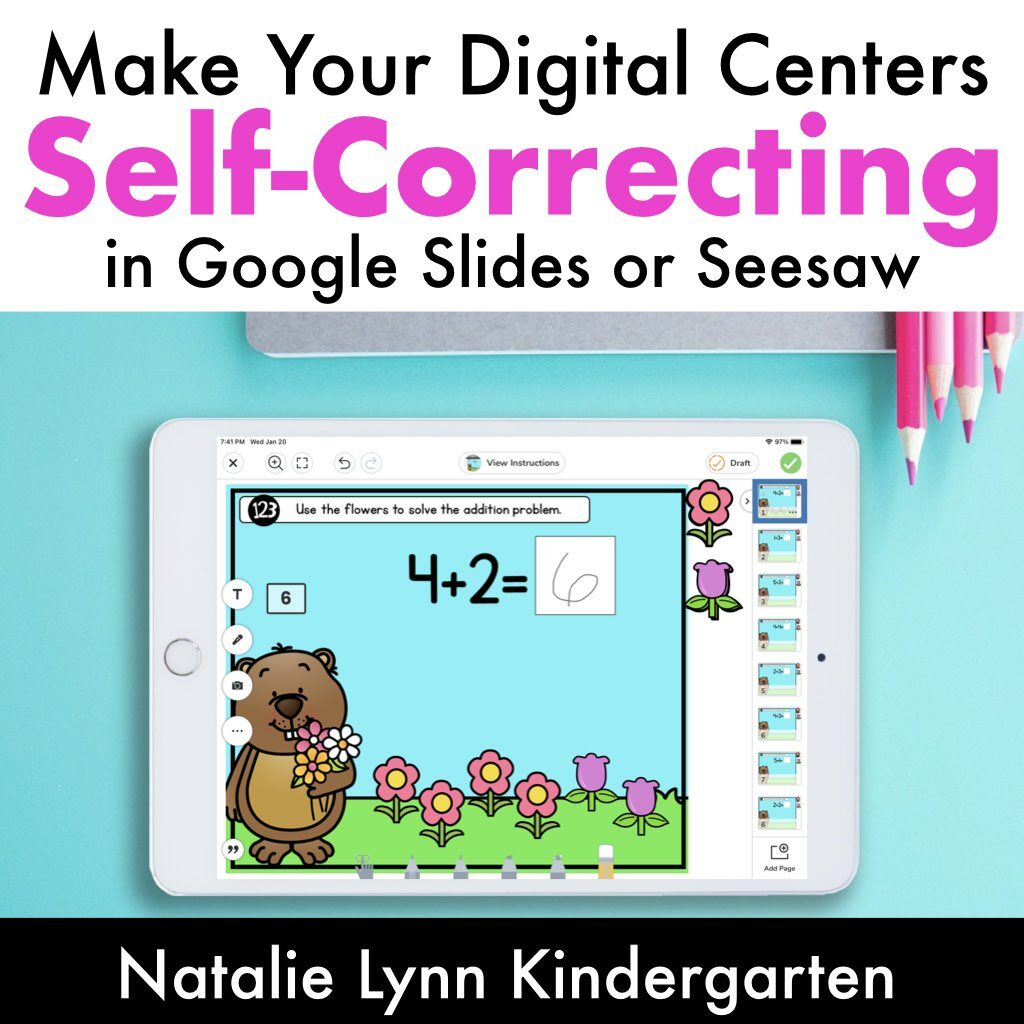
This year has been a year of growing pains – particularly in using digital centers in Kindergarten! My hope is to make life a little bit easier for you with these Google Slides, Google Classroom, and Seesaw tutorials.
Using digital centers in Kindergarten is a balancing act. Generally I don’t make self-correcting digital centers. That’s because I want these virtual centers to be an assessment during remote learning.
But sometimes you want to make your digital centers self correcting. These Google Slides tutorials and Seesaw tutorials will show you how.
Why make self-correcting digital centers?
Making your digital centers self-correcting can help your students be more independent when completing distance learning centers.
I like to make just the first 1-2 slides of an activity self-correcting. This gives my students some support before they complete the activity independently. I can use the rest of the slides as a virtual learning assessment.
How to Make Self-Correcting Centers in Google Slides
Making self-correcting activities in Google Slides is SO simple! I start by selecting and exporting only the slides I want to assign to my students.
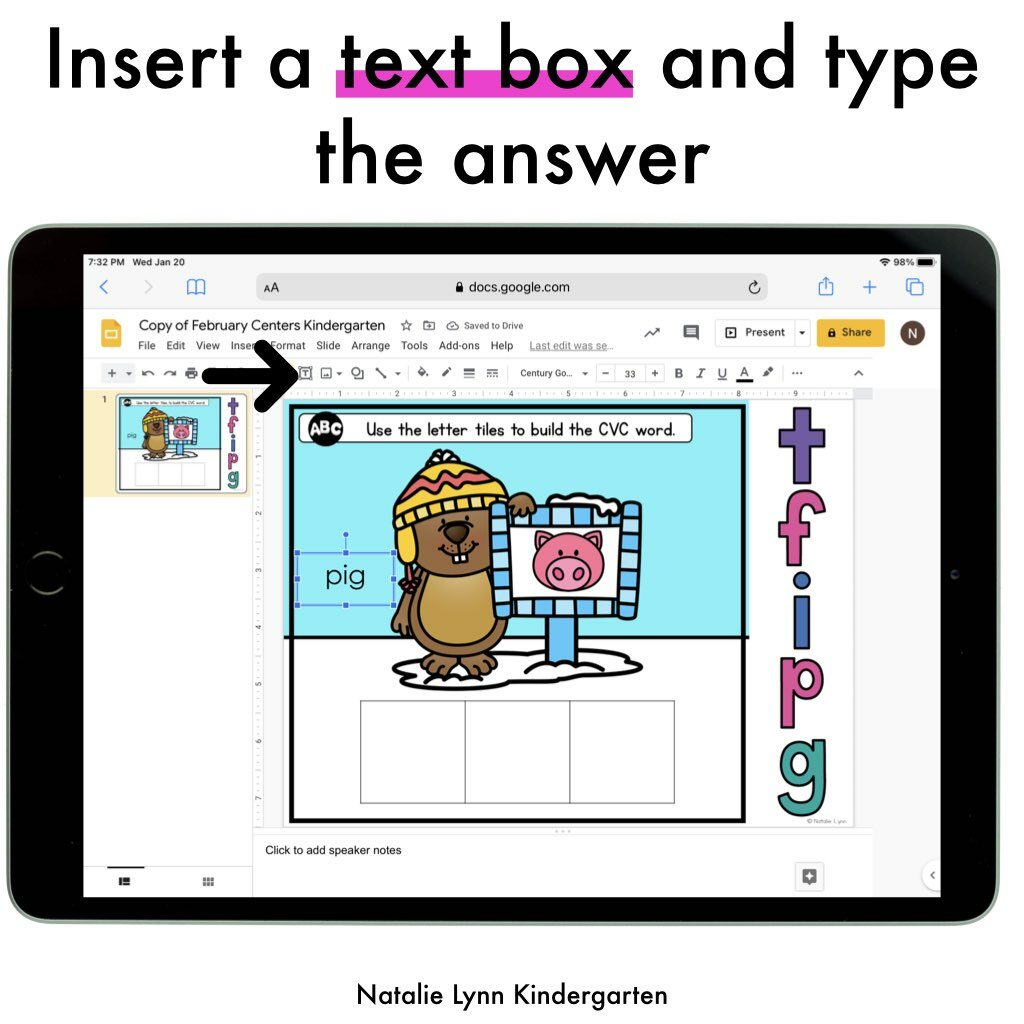
Then, make a text box and type the answer. I try to place this somewhere out of the way on the slide.
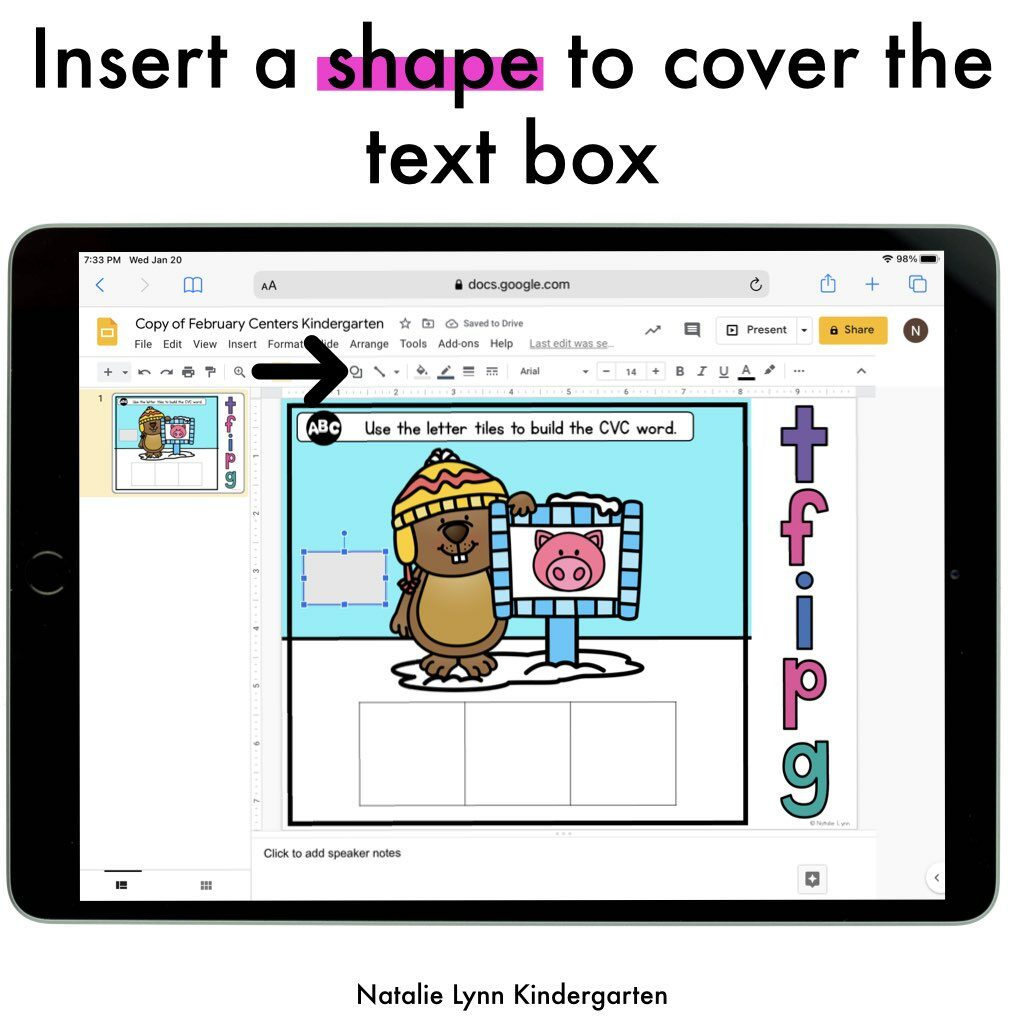
The next step is inserting a shape. I choose the square shape and make it large enough to cover the text box.
You can format the shape however you want. I typed “check your answer” in the box. My kindergarteners may not be able to read that, but their parents will know what it is.
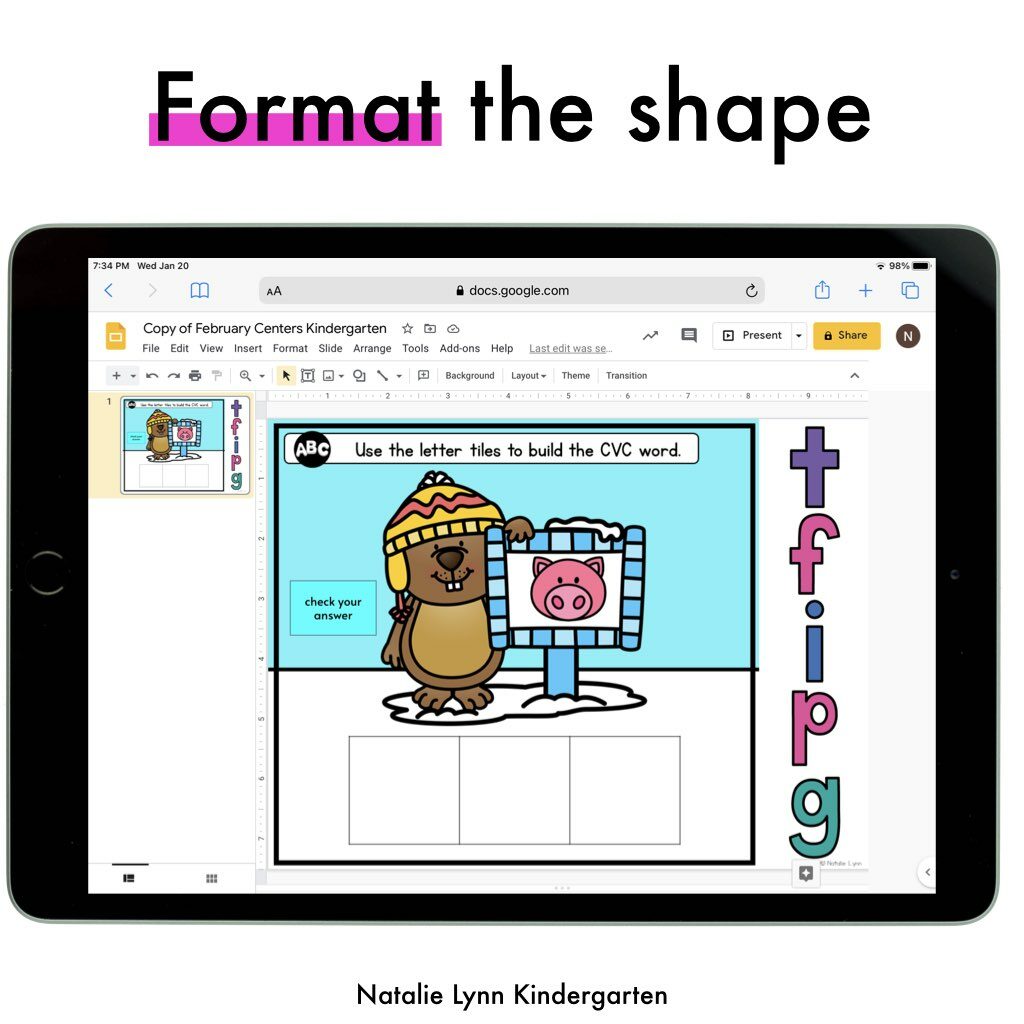
After students complete the digital center activity, they can check their answer by moving the shape.
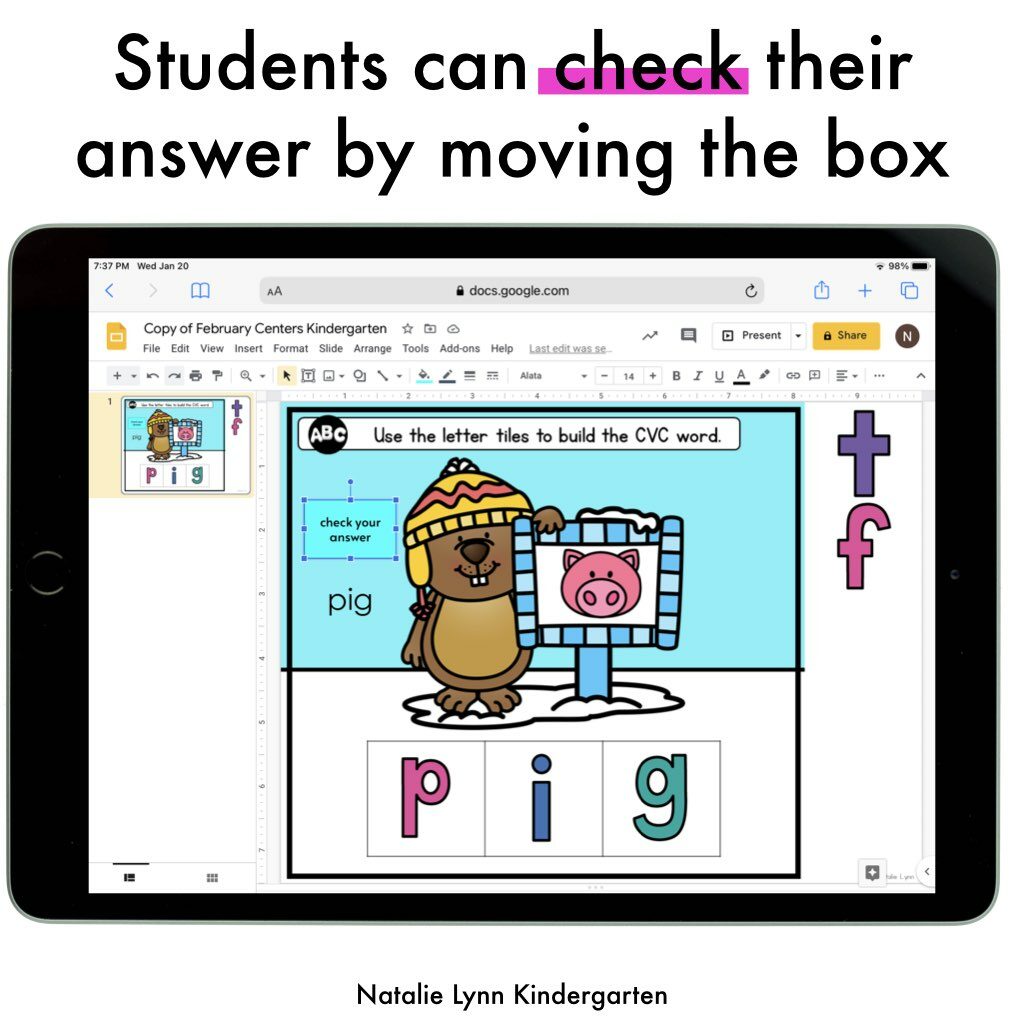
See what I mean? Making digital self-correcting centers in Google Slides couldn’t be easier!
How to Make Self-Correcting Activities in Seesaw
Making self-correcting centers is a little bit trickier, but not too bad! Most likely you will not want to make these changes to your original Seesaw center.
(If you need a Seesaw account, click here to sign up.)
To begin, open the Seesaw activity and click the three dots in the bottom right corner. Choose “Copy and Edit Activity.” This will allow you to make changes and assign it without altering your original Seesaw center.
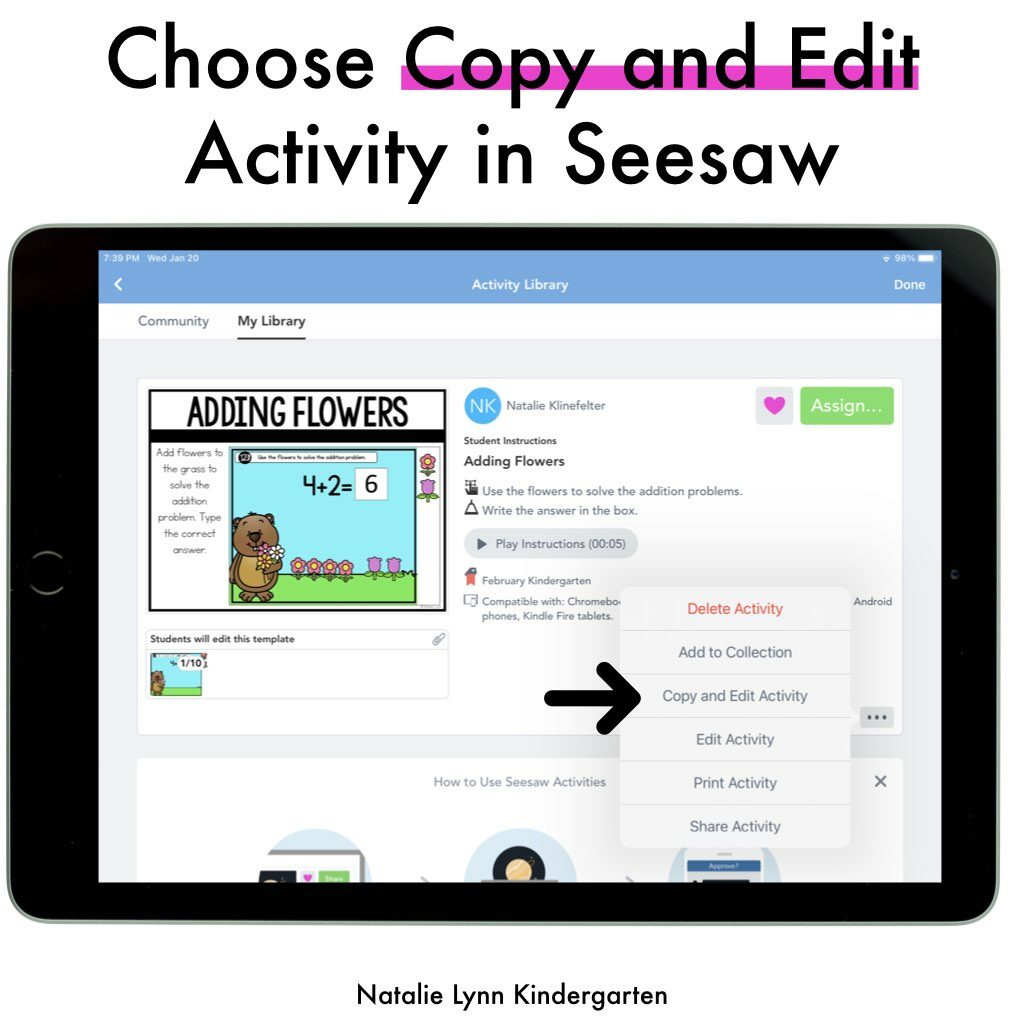
You will be able to edit the directions and template from here. I do suggest renaming this Seesaw activity so that you don’t mix them up in your activities library.
To make your Seesaw activity self-correcting, click the student template at the bottom.
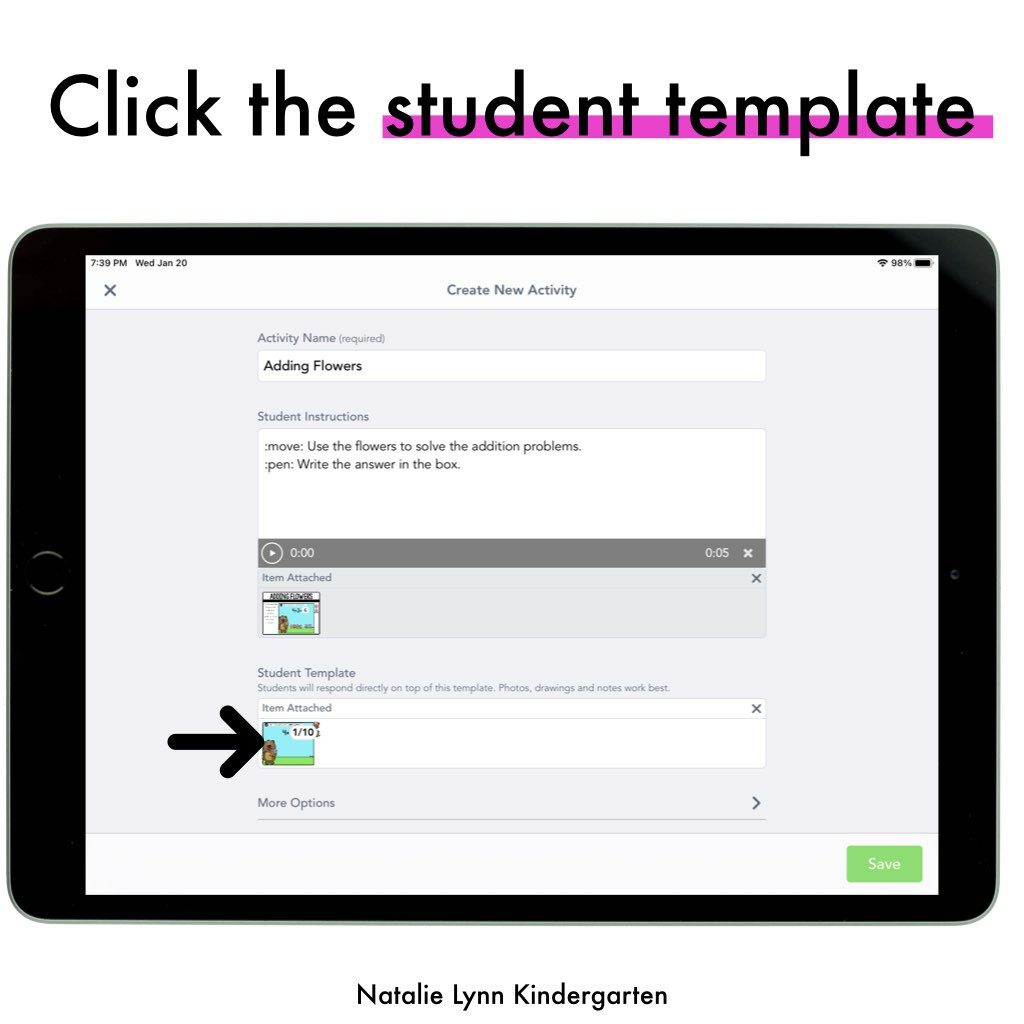
This will open up the slides that students will work from. You will begin making your Seesaw activity self-correcting by typing the answer. Do this by either double-clicking the screen or clicking the T on the left-hand side.
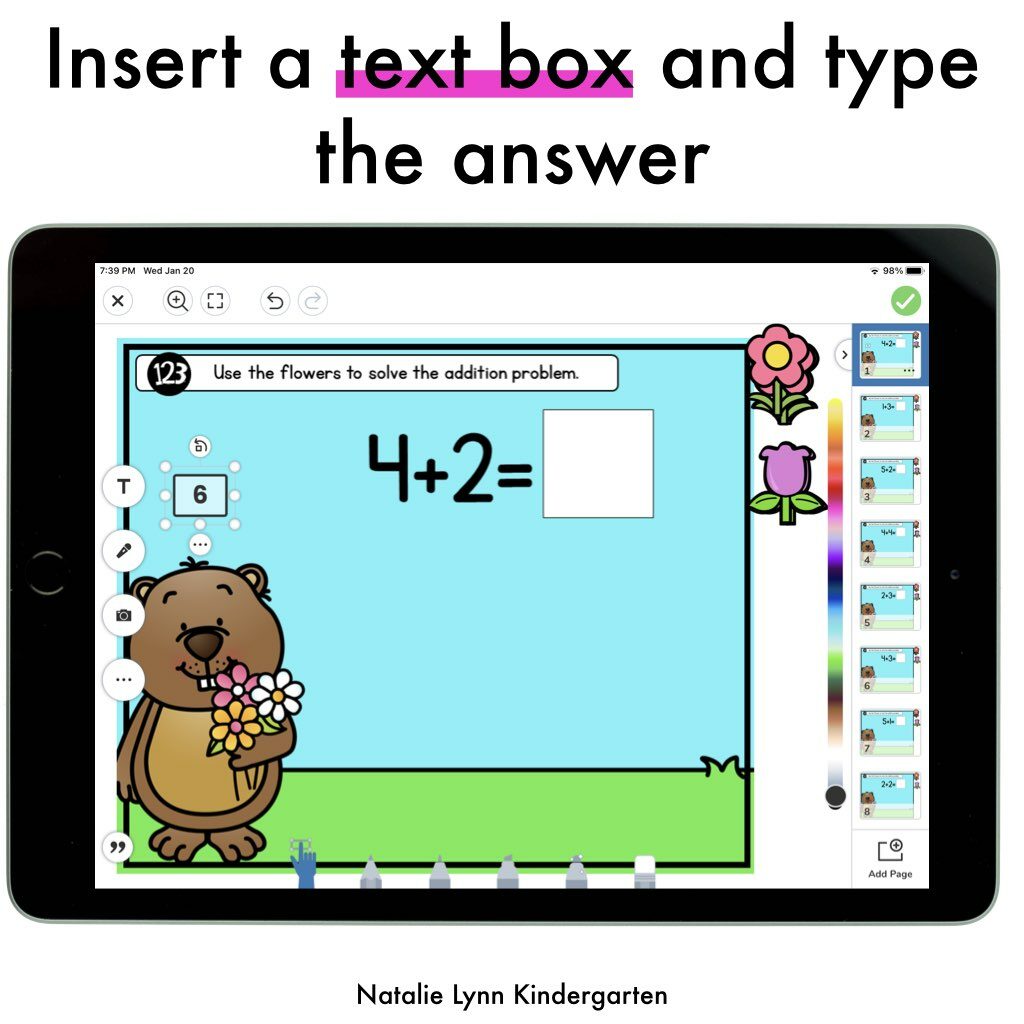
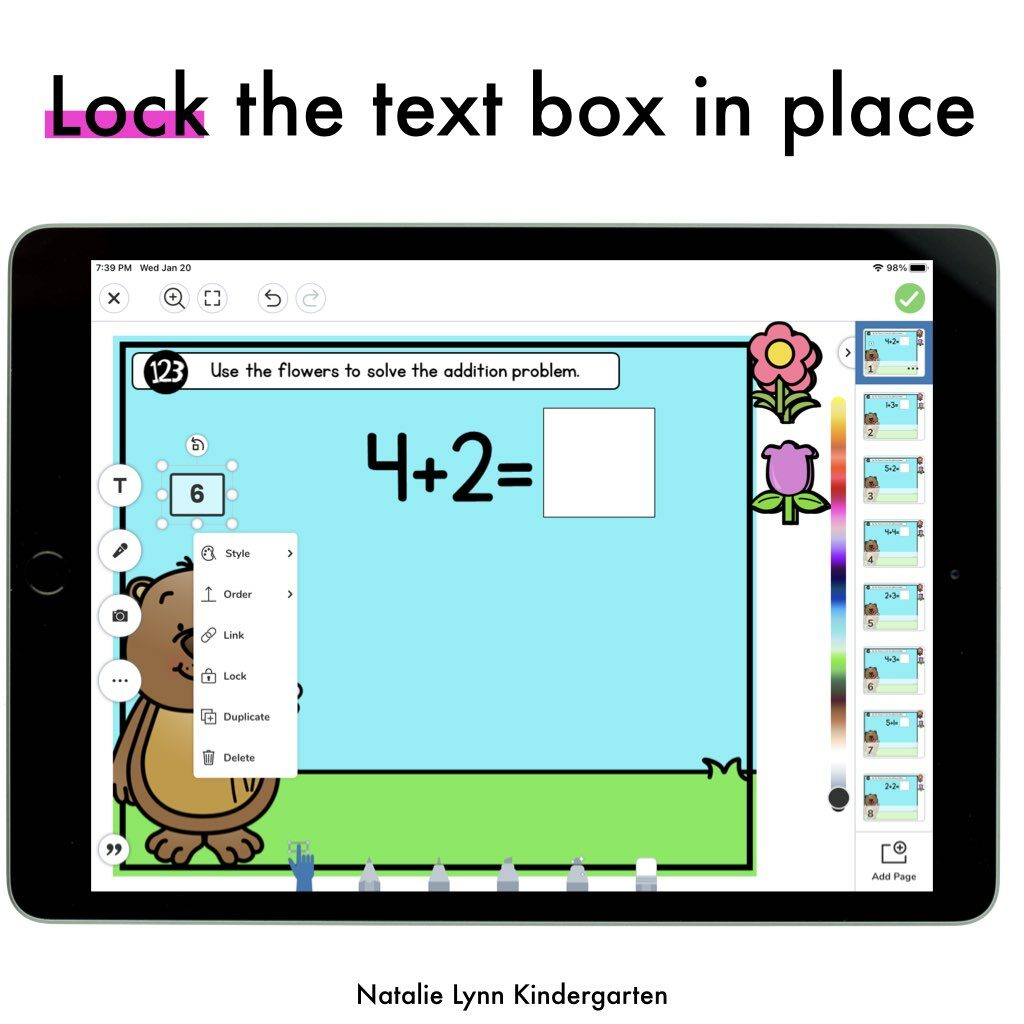
Move that text box to where you want it. You will want to lock it in place so that students cannot move it or delete the text box on accident.
To lock a text box in Seesaw, click the text box and then click the three dots on the bottom of the text box. Choose “lock” from the option list that pops up.
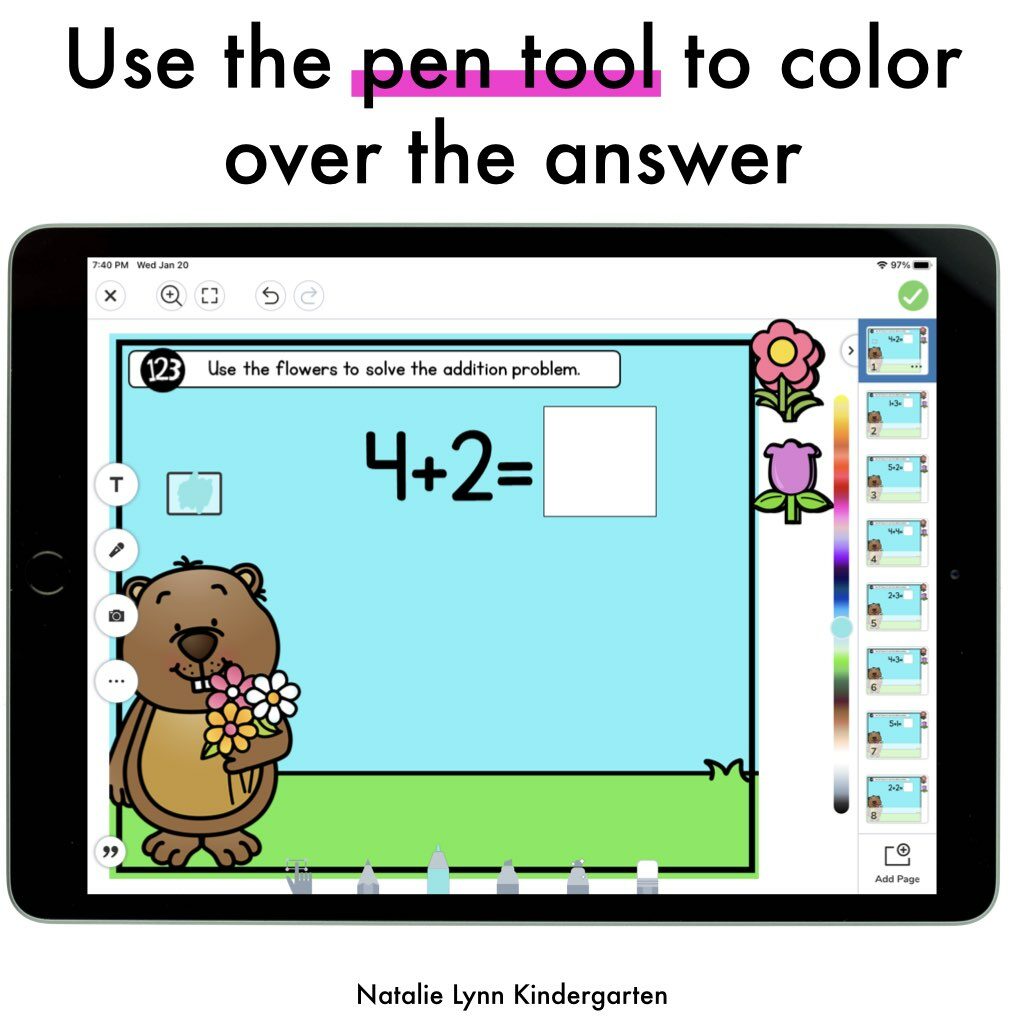
To cover the answer, use the pen tool and choose a color similar to the background. Color over the text box.
I try not to cover the text box completely, because I want my students to know where the answer is. You will want to model finding the answer box for students.
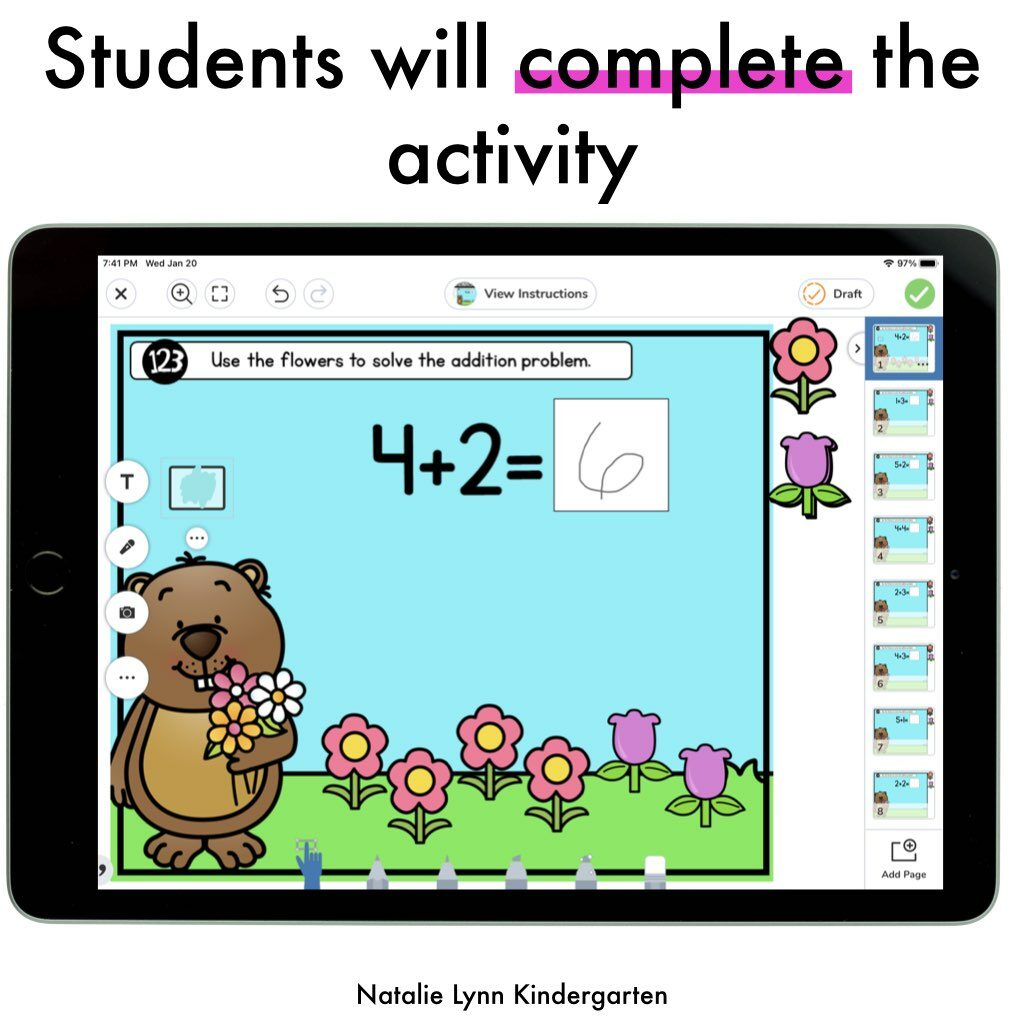
Now you can assign this activity to students. Students will complete the activity before checking their answer. I suggest modeling that several times.
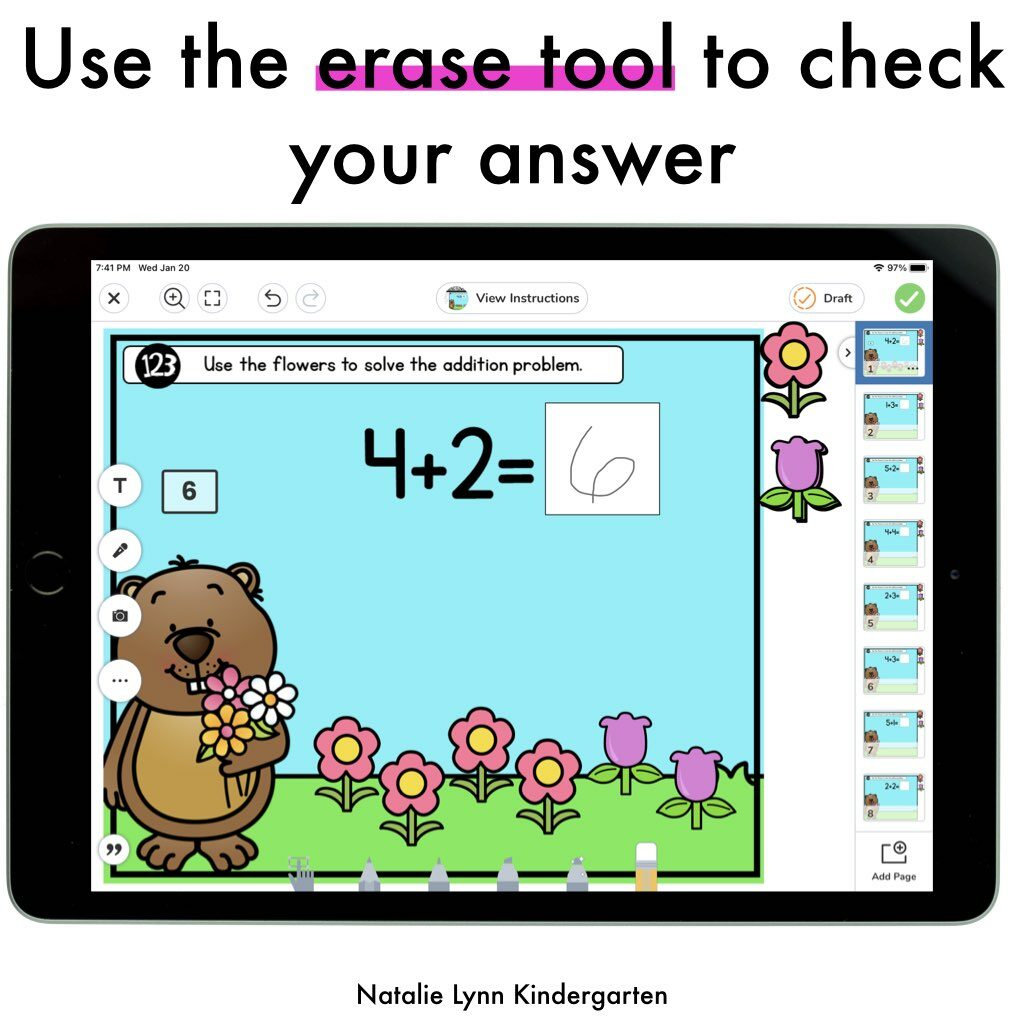
After students complete a slide, they will use the eraser tool to erase the pen that is covering the text box.
See? Making self-correcting digital activities is super easy in both Google Slides and Seesaw!
Do you need digital centers for distance learning and beyond?
Whether you need digital centers for remote learning OR you want to use them as paperless center options in the classroom, I’ve got you covered! I have digital centers formatted for both Google Slides and Seesaw. You can find Kindergarten digital centers HERE and First Grade digital centers HERE.
Pin this tutorial for later:
